In photography, exposure is the effect of light rays on a film or matrix. Most likely, this information is not a secret for you, but have you heard about the concept of multiple exposure photography? If not, read this article carefully because I will tell you about the numerous exposure techniques in photography.
Multiple Exposure Photography: What and Why?
Before talking about how to shoot in such a way as to get multiple exposures, you need to interpret the term itself. It means various or multiple exposures. To put it more scientifically, we expose the same photo several times.
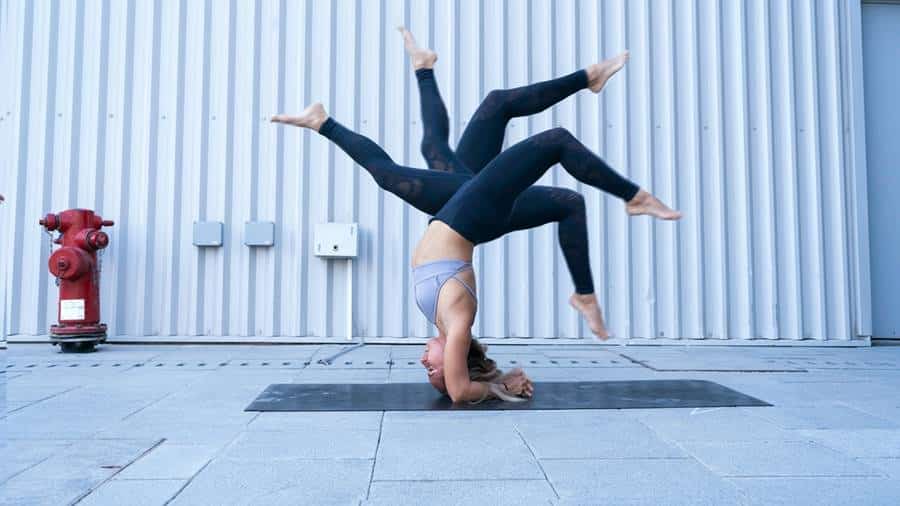
In practice, this requires taking a few pictures of something or someone. It will not necessarily be a single-frame shooting, that is, at an equal interval of time. However, it is possible so – the photos will be slightly different and, for example, you can convey motion impressively.
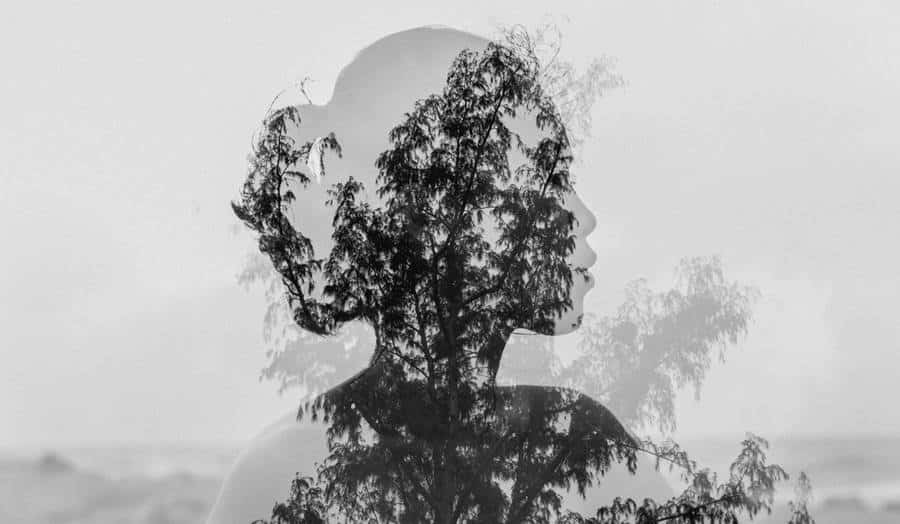
The images selected for further alignment can be completely different: taken at other times, in different places, even shooting live and inanimate objects. The main thing is that it should be thought out.
For all photos included further into one, you need to edit the size and the color gamut, the degree of a blur – to decide on the leading figure and background, etc.

It’s funny that double exposure initially occurred in film photography due to the photographer’s mistake when several scenes were captured on one part of the film.
The uniqueness and bright artistic component did not leave anyone indifferent. Multi-shooting is also present in digital cameras, demonstrating the finished result of overlaying the photos taken right on the screen.
It is often no more than ten combined frames, maybe less – only 2-5.
Undoubtedly, making multiple exposures on the camera is easier because you do not need to copy everything to a computer. You do not need to open Photoshop and transfer photos there one by one. There are fewer possibilities since the camera will perform almost all actions at its discretion – the colors and the layers’ transparency.
Different Uses of Multiple Exposure Photography
We can talk about two completely different goals that are realized with its help:
- Creative, that is, the sheer overlay of the photo and the creation of an unusual picture with the author’s vision in this way.
- High-quality image change – high-resolution photo with less noise, more saturation of colors and shades, good clarity.

Let’s talk first about the first point and how to do it. Here, as I have already indicated, it is quite possible to create the impression of a moving object.
You may also like to read: Ideas for An Artistic Photoshoot
You can also multiply the object and present it in a single frame. Examples show stimulating effects when the same scene is shot at different focal lengths or different degrees of focus. No matter how you experiment with the multiple exposure technique, it would help if you considered the following nuances:
- Draw a large object in one photo and a small thing in the second.
- Always place a dark frame underneath lighter or lighter areas of one image and shadow areas of another.
- Mix different colors, including opposite ones.
- Try shooting the same scene with multiple lenses.
- Use different types of photos. Let’s say you combine portrait and landscape as a background.
- The image does not have to be in color, but the shades of black and white should also be adjusted in post-processing.
- Shoot so that the frames differ in exposure by one stop.
- Make allowance for light changes over time or in great locations.

Now let’s touch on a question that one of my previous articles has already been devoted to creating an HDR photo or working with the dynamic range of images. In this case, you also take several frames, usually three. They differ by only one stop of exposure; thus, an underexposed, regular, and overexposed picture is obtained. By superimposing them on top of each other, it is possible to improve the image, initially with flaws expressed to a certain extent.
Just imagine, even if you photographed a landscape with manual settings, there might be significant flaws in it, for example, an eerily light sky or a completely dark area of the earth.
To bring a photo to an acceptable form, you will have to spend both time and effort in Photoshop or Lightroom. So why do this if you can take a few frames in a couple of seconds and then combine them! Of course, everything is not as simple as I described.
You will have to work in a particular program; nevertheless, this is one of the effective methods of transforming a photo from ordinary into high-quality, worthy of the pro level.
You may also like to read: Color Processing: 10 Tips for Accurate Color Processing
It is all about multiple exposure photography. If you want to understand your camera in more detail, then the video below given courses will be simply irreplaceable for you. You will learn about the many possibilities of your DSLR camera, learn how to set the correct settings, and, accordingly, get high-quality photos.


