One of the previous articles touched on the topic: how to use a flash indoors. Almost all aspects were covered. Now in the article I will tell you about using flash outdoors in daylight, and why it can be used not only in low light levels.
Necessary Equipment
To begin with, it’s worth talking about the equipment that can come in handy during such a shoot. “But you have already described the tools necessary for shooting,” you say, and you will be right. But, when using the flash outdoors, one detail is almost impossible to do.
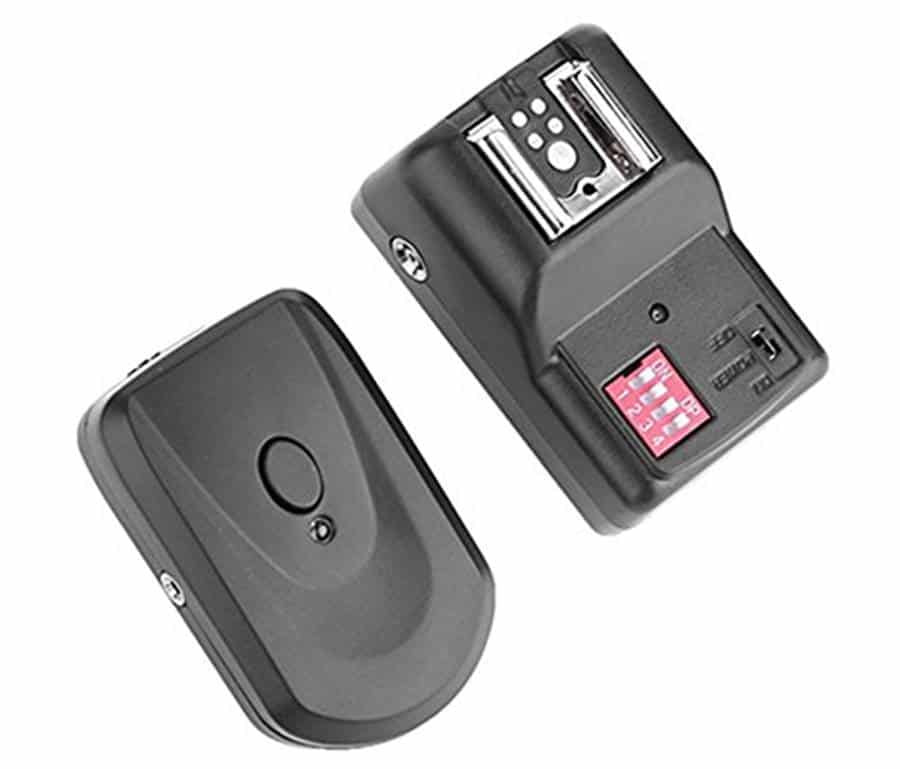
Synchronizer
The first thing you need is a synchronizer. What it is? It is customary to call a synchronizer a small element responsible for the moment the LED is triggered at the right time, if it is not located on the camera. Why bother with it when you can safely mount the part on the hot shoe and remove it?
The answer is simple: the flash on the body is used very rarely during the day, because it, most often, serves as an auxiliary light. To obtain the highest quality images, an external LED is usually installed on a stand, or given to an assistant with a leader. The synchronizer forces artificial lighting to fire simultaneously with the shutter mechanism.
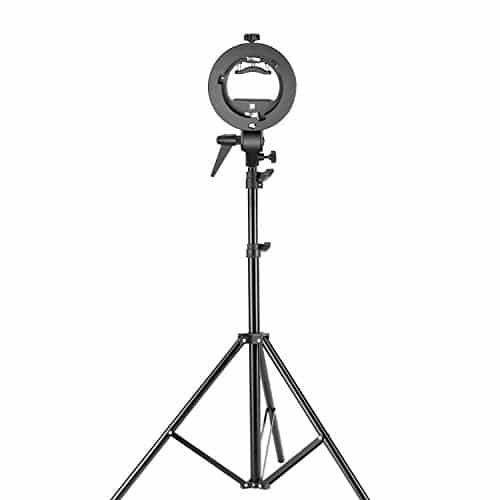
Studio Stand
What for? This is a great substitute for an assistant. It does not need to be paid, it will never require a break, it will not refuse to work at the most crucial moment, however, it will have to be dragged behind its back. In addition, a separate purchase of a stand can be expensive, so you can use a regular tripod instead of it for the first time.
When buying the stand, you need to pay attention to its height, folded dimensions and weight. The height should be more than two meters, and the dimensions and weight are minimal. All this is necessary for the versatility of the future tool and the possibility of its convenient transportation.
Flash Attachments
They can be umbrellas, soft boxes or simple reflectors. As for me, I have a very negative attitude to umbrellas. Why? It’s simple, the umbrella gives out a bright light after reflection, which is not always necessary. I prefer soft boxes to flash. They come in different sizes, depending on the degree of dispersion.
As for the overall dimensions, the umbrellas are just that. White for transmission and silver for reflection. They won’t take up much space. If you have the opportunity to carry something more voluminous with you, then, of course, it is better to take a soft box. It is more demanding on the light source, but it provides a decent result.
Shooting Process Using Flash Outdoors in Daylight

So, we got to the most important thing – the very work with the flash during the day. Several cases can be distinguished here. I’ll tell you about three, since the rest, one way or another, have already been touched on in the last article on working with flash. It should also be mentioned that the methods described below are applicable to both DSLR and mirrorless cameras.
You can get high-quality images on Canon, Nikon, Sony, Olympus and any other device.
The First Case: Using Flash Light As Fill
It is used, as a rule, if the light from the sun is too harsh, or if the camera lens is directed against it. The flash should then be positioned opposite to the direction of the sun’s rays. This is necessary so that the shadows, when backlit, are not too deep and harsh.
There are also a few rules to keep in mind here. The intensity of artificial light should not be more intense than natural light. To do this, you should put on a soft box on an external flash, or lower the power of its pulse, otherwise our picture will turn out to be too flat.
The most attentive readers may have noticed that when the camera is positioned against the sun’s rays, its position coincides with the location of the flash. “In that case, too, can’t you place it on the camera?” – you ask. Of course, you can. This case is that small fraction of the options when the use of artificial lighting “in the forehead” is justified.
You may also like to read: Sunset Photography Tips: How to Photograph a Sunset Like A Pro?
The Second Case: Using Flash as Modeling Light
This situation is much less common than the first. Most often, photographers do not undertake such adventures, fearing to ruin everything. In vain, by the way. It is these pictures that often occupy one of the first pages in the portfolio of professionals, since it is not always possible to achieve a good result under such conditions.
So why is the flash sometimes used as the main light source? It’s all about the sunlight. It may not always be bright enough to illuminate the entire frame.
Most often, this is observed when the sun provides ugly light: too bright in open areas, with too dark shadows, or, worst of all, spotty. In such cases, artificial and natural sources are interchanged and the power of the first must be increased so that it is stronger than the second.
Case Three: Work in Low Light Conditions
This case applies primarily to sunrise, sunset and twilight. It is not so difficult to apply: the camera exposure is set to natural light and fixed. After that, the main object is added to the frame, and it is highlighted with a flash.
The main thing here is not to overdo it with the brightness level of the lamp, otherwise the light, as in the first case, can make the image flat. Also, you should not completely reduce the brightness. This can increase the amount of noise, reducing the detail in the photo.
This is where you need to experiment with the flash power, as situations are different and there is no specific setting. It is advisable to always use a rag or plastic diffuser in such situations.
If it is completely dark outside, you can use a system of several flashes. This may require several stands or assistants to illuminate the background and subject. However, this will already be an outdoor photo studio, which does not fit into the subject of the article.
If you don’t know much about your DSLR, then you should look into it. I offer video courses that will help you understand and understand your DSLR, teach you how to take pictures correctly.
That’s all for today. If the article was useful to you, then tell your friends about it, and also subscribe to my blog, there are many interesting things ahead for you. Hopefully, you will make the right choice when buying your equipment, as well as learn by yourself and tell all your friends about the benefits of using the flash outdoors. See you later.
