Lens Distortion (from Latin distorsio – curvature) is an optical distortion of space. Distortion is most common when using wide-angle lenses. There are three types of distortion: barrel (convex), pincushion (concave), and perspective.
Pincushion distortion is typical for a wide-angle. On telephoto lenses, it is absent, but pincushion distortion can appear (usually from a focal length of 200 mm and above). Portrait and stock photography lenses (85 mm and 50 mm) are the least susceptible to distortion, practically invisible. So distortion correction is most often necessary when shooting with wide-angle lenses.
When is Distortion Most Noticeable?
When there are straight lines in the frame throughout its area, for example, when shooting architecture with a wide-angle or ultra-wide-angle lens, you will need to do pincushion distortion correction. And if the shooting point was low – then hello, the distortion is perspective!
However, there are positive aspects to this. As I said earlier, shots taken with ultra-wide-angle lenses (the so-called “fisheye”) have pronounced optical distortions. But in this case, this is not a minus but a plus of the lens. It’s a strong point, and this is why it is so appreciated in the photography community.
I assure you, no portrait lens, and even more so telephoto can give such a good wow effect when the space is covered by all 180 degrees. And this, by the way, is not the limit for a fishy. Some examples allow you to take a photo at 270 degrees in one actuation of the shutter. Although each lens has its purpose and its strengths, fish still have a certain charm.
Lens Distortion Correction
Fortunately, if necessary, each of the above distortions can be corrected. In landscape photography, by the way, distortions are less noticeable than a photo of architecture, which is replete with vertical lines.
For example, let’s take a photo with barrel distortion, which has both kinds of lines (horizontal and vertical). It will best demonstrate the effectiveness of the Lens Correction Toolkit. If you read the profile in the illustration on the right, you already know that the photo was taken by a sweet couple – a full-frame camera and a fisheye lens.
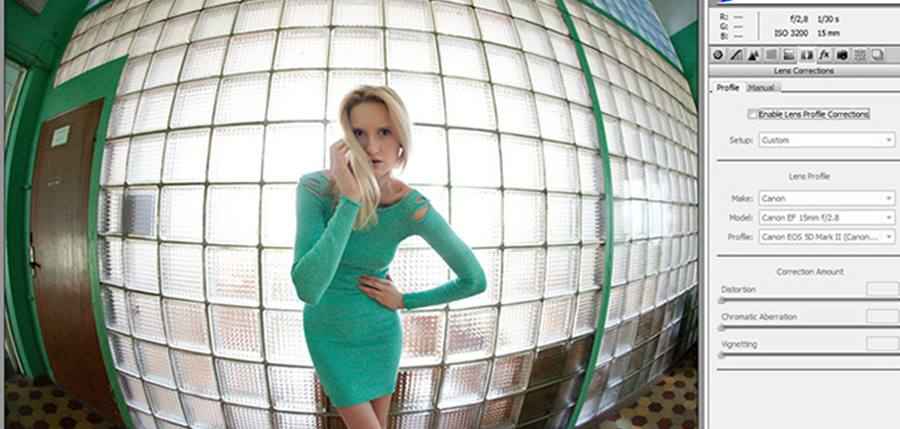
First, let’s fix the distortion – apply a profile and more accurately adjust the result with the slider. As you can see, we waved the barrel distortion knob. It remains to align the horizontal and vertical lines.
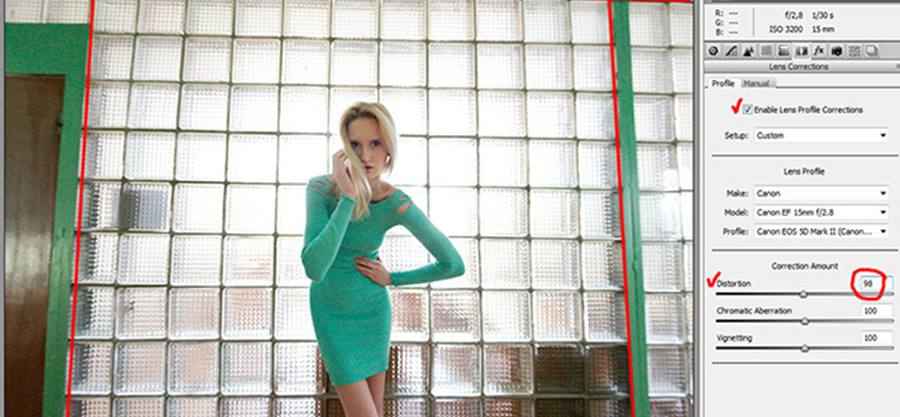
Perspective distortion can also be corrected here. To do this, we will use the sliders responsible for the appropriate correction. A unique grid (which appears by pressing the V key) will help build the correct frame geometry. In the illustration, you can see that the vertical distortion has already been corrected.
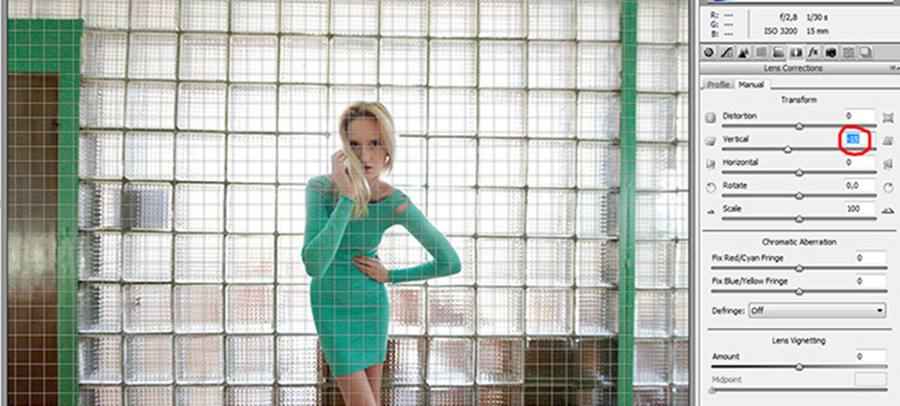
So, all the lines are lined up almost perfectly (in the illustration, the sliders used are marked). Because we were correcting the barrel distortion, there was a slight loss of information in the center’s lower part of the frame. Therefore, the final touch is cropping (the sixth tool in the upper left corner of the illustration). To automatically frame, leaving all the usable space and exclude the eaten – put a tick opposite the Constrain to Image function (see picture below).

Disadvantages of Distortion Correction
As a result of distortion correction, cropping (cropping) of the curved edges of the corrected frame may be required, affecting the composition. Correction also redistributes the image resolution: with pincushion distortion, the sharpness at the edges of the frame concerning the center can be increased after modification. When correcting barrel distortion, on the contrary, sharpness at the edges of the frame may drop.
Perspective distortion is not technically distortion as it is a natural manifestation of the lens’s 3D rendering. Our brain, in turn, “knows” how objects look correctly in reality and therefore perceives converging lines in the photo (in those cases when they should be parallel) as not corresponding to reality. For correct display of perspective, special tilt/shift lenses are used, in which the tilt/shift properties of the lenses make it possible to exclude the appearance of perspective distortion.
So we examined the main disadvantages of photographic optics, learned how to avoid their appearance, and mastered their neutralization methods when they appear in the pictures.
Hopefully, your photos will be even better now. At least technically, they have to become one.
How to Remove Lens Distortion?
A more “aspherical” element correct the distortion, i.e., the lens, which has a more complex surface, is not spherical like most other lenses in the lens.
Automatically
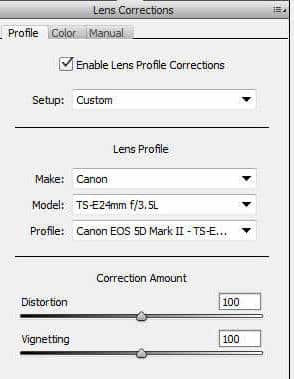
Residual distortion can be corrected in a graphics editor. There are distortion correction profiles for many lenses that can be loaded into Adobe Camera Raw using the Adobe Lens Profile Downloader.
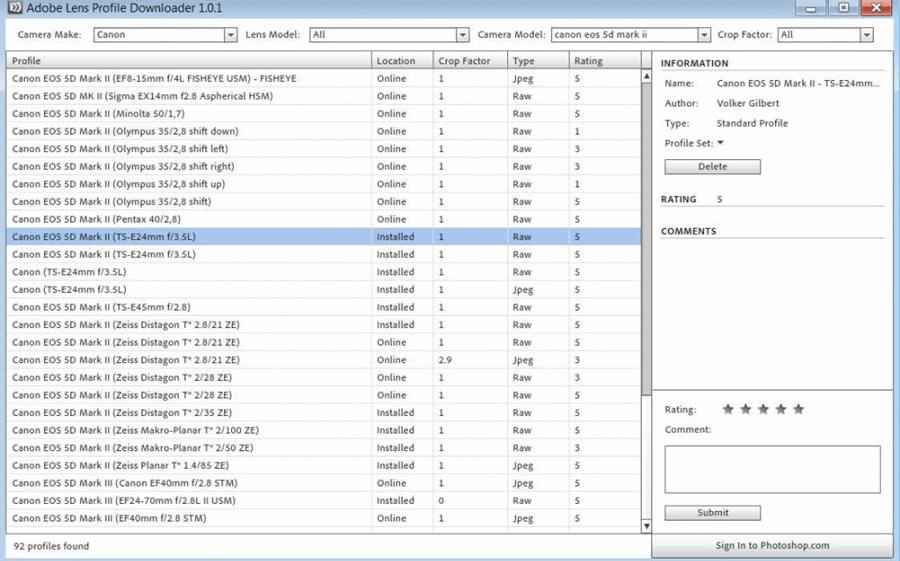
Then you go to Adobe Camera Raw, open your photo, and activate the lens profile in the Lens Corrections tab.
Manually
There are times when there is no profile for a lens. After all, a profile is based on a combination of a camera and a lens. And therefore, it is highly likely that there is no correct profile for your camera. Or you have a rare lens for which there is no profile.
Easily remove distortion manually. To do this, you need either Adobe Camera Raw or Adobe Photoshop.
Adobe Camera Raw
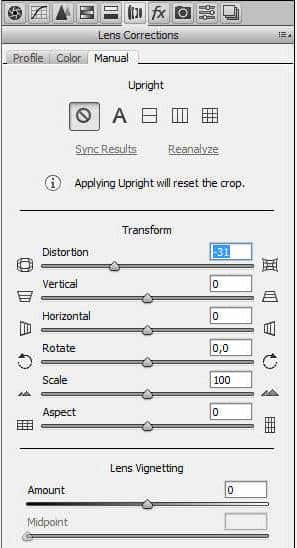
Open your shot in Adobe Camera Raw and go to the Lens Corrections section. There, select the Manual tab. And with the slider in the Distortion sub-item, you achieve the elimination of distortion.
Adobe Photoshop
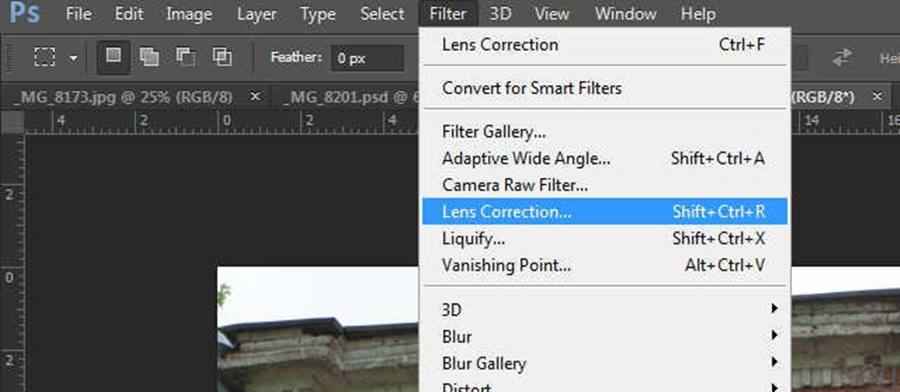
Open your image in Adobe Photoshop and go to the Filters section of the menu. There you will find the item Lens Correction in the menu.
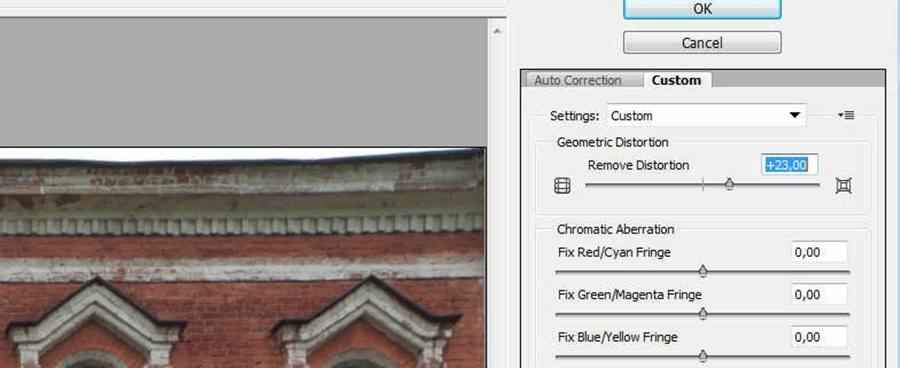
On the right side of the window that opens, select the Custom correction mode. And move the Remove Distortion slider until it is completely corrected.
Lightroom
Even in a simple utility such as Lightroom, this option can be enabled.

And in principle, it will correct some minor flaws, but the distortion does not always disappear completely. In Photoshop, you can easily remove geometric curvatures through Correction – Geometric Distortion (Correction – Geometric distortion), setting the desired parameters.
There is also an alternative but a pretty expensive option for correcting optical distortions. For example, Thomas Niemann released the pt Lens plugin, which remained free until its design capacity. Today it costs about $15. The advantage is the built-in profiles of lenses and cameras, their automatic detection from the EXIF data of the image file, and the correction of other distortions, such as vignetting (darkening towards the edges of the frame) and chromatic aberration (blue or red halos around high-contrast objects). It is worth downloading and at least trying to fix no more than ten frames.
Good luck!


