With such an optical phenomenon as diffraction, photographers meet pretty often. Unlike other distortions such as distortion or chromatic aberration, diffraction is equally common to any lens and cannot be eliminated. In this article, we will look at the diffraction problem in photography practice.
Diffraction is an optical effect that reduces the sharpness of a photo no matter how many megapixels your camera has or how sharp the lens you are using is. If usually the rays of light propagate in a straight line, then passing through a small hole (closed aperture of the lens), they begin to scatter. In this case, the beam forms in the photo not a point but a circle – the so-called airy disk. The more we close the aperture, the more noticeable the diffraction becomes since each moment in the image ceases to be a point.
It is possible to notice diffraction with the naked eye when the Airy disk size becomes comparable to the size of one pixel on the matrix – this is the diffraction limit.
Specificity of The Action of Light
Any photographer actively involved in his business will soon notice unpleasant light, color, and other effects in the frame.
Diffraction manifests itself in a decrease in the detail and clarity of the image, regardless of its resolution. They also talk about diffraction rings or fringes that appear near objects. What are the following physical laws? How can such a phenomenon be explained?
Diffraction refers to light. It is an exception to the rules of the section of geometric optics. Translated from Latin means “broken,” “bending” is a very close description of the existing process.
It is what happens: the light beam, which has the character of a wave, travels in a straight line. But if they encounter some obstacles in the form of dense, opaque objects, then that “bypasses” and partially penetrates behind them into their shadow areas. Here the main “danger” lies in wait for us – as a result, even the borders of the shadow (and what is in the shadow) soften, become not quite sharp.
Moreover, I can tell you that the principle of light bending around objects is also applied to the camera aperture itself because its petals fit into the category of “dense obstacles.” Thus, we are dealing not with one but several waves of light, which interact and superimpose on each other.
Is it hard to imagine? And try to squint your eyes for a moment, so everything around you turns out to be vague, as if behind fog or veil. The camera is about as rugged.
An unpleasant phenomenon, creating additional complications, but inevitable. It will not be possible to eliminate this or another kind of distortion as much as you would like. Therefore, you need to remember them and try to minimize the available means.
Effect on The Image
I told you not just exciting facts from the field of theoretical physics. It is a real drawback that can be visible in the photograph and reduces its attractiveness to the viewer and the author.
You can clearly understand what diffraction is by going to various forums of amateur photographers or by doing a series of camera tests yourself.
Mount the camera on a tripod, eliminate vibration, select manual or aperture mode, and shoot one subject with excellent f settings.
Do not change the other exposure variables. Some people use a particular scale or sheet of paper with a target picture (pdf format). Images with a difference in aperture are judged by the clarity/blur of the entire target (numbers, letters, lines, or a specific object) or its edges.
Diffraction is such a defect in the work of optics, with which practically nothing can be done in photo editors. The only way out is to minimize its impact during the filming phase.
Let’s examine a series of test photos taken with the Nikon D3400. This inexpensive device with a matrix of the APS-C format has a high resolution (24 megapixels), so we will evaluate all the details in the photo. At the same time, we will see the appearance of diffraction. Below are fragments of the image at 100% magnification.
It is convenient to evaluate the sharpness of frames, for example, by the sign of a pedestrian crossing. You can see that detail starts to decline after f/8 and drops critically towards f/14. The more the aperture is closed, the minor details remain in the picture.
The test photos show that the diffraction limit on the Nikon D3400 is around f/8; further diffraction is noticeable.
Let’s look at the Nikon Z 7 as an example of how full-frame sensors behave in such situations. It would seem that diffraction should severely affect the 45-megapixel Nikon Z 7 sensor because it has a very high resolution. However, the pixel density of this matrix is still lower than that of the 24-megapixel crop. It’s easy to calculate – divide the number of megapixels by the sensor area.
So, let’s compare in practice a pair of test images taken at f/8 and f/16 on a crop and a 45-megapixel full-frame.
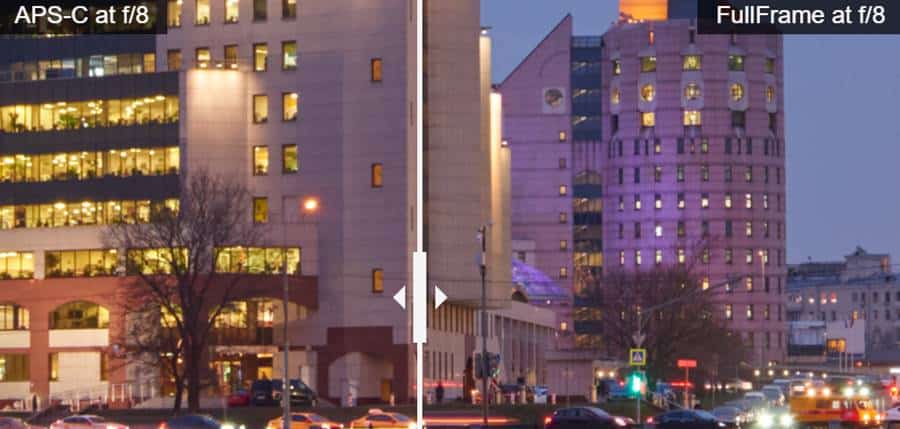
It can be seen that even at closed apertures, the full-frame camera provides better detail. The example at f/16 is especially indicative: the picture is inoperative on the cropped matrix, and the full-frame image can still be used.
Photography Practice to Avoid Diffraction
It may not be clear to a beginner photographer why you should close the aperture so hard that diffraction begins to affect the photo. However, there are many reasons why you have to use closed diaphragms.
The first and main one is to increase the depth of field. In many areas of photography, it is necessary to show sharp all objects in the photo, placing them in the depth of field. The diaphragm controls the depth of field, and sometimes you have to close it tightly in order, for example, to sharply show a flower in the foreground and mountains in the background in the frame. In such cases, a slight reduction in sharpness due to diffraction is better than just a non-sharp foreground or background.

But do not rush to close the diaphragm all the way. First, learn to calculate and use its values rationally. So, in the landscape, architectural and interior photography, various methods of focusing and working with depth of field are used. One of them is aiming at the hyperfocal distance.
Perhaps every photographer must determine for himself the level of de-sharpness to which he is ready to go. For example, when photographing with a full-frame 45-megapixel camera, I decided for myself f/16 as the maximum value. Shooting at a crop where diffraction takes its toll first, I prefer not to cover more than f/11.

A similar problem occurs when shooting small objects and in macro photography, where after f/8, the operating range of apertures only begins. Since the shooting is carried out at a short distance, the depth of field is also extremely shallow. Therefore, to show the object completely sharp, you have to close the aperture seriously. It is better to neglect diffraction here but achieve the desired depth of field than to get just a blurry frame due to lack of depth of field.

But the depth of field cannot be expanded indefinitely. When shooting small objects, instead of closing the aperture too much, focus stacking is used. Sometimes this technique is used when shooting interiors and landscapes. Its essence is that several shots are taken focusing at different distances, and then the result is brought together on a computer. This technique helps to avoid the adverse effects of diffraction and, at the same time, expand the depth of field to infinity. The Nikon D850, Nikon Z 7, and Nikon Z 6 cameras have built-in focus stacking.

The second reason why the aperture is tightly closed is the desire to achieve perfect sharpness and no distortion in the frame. At open apertures, lenses can produce a far from a perfect picture – with blurry edges and an abundance of chromatic aberrations. Defeating this is easy – cover the diaphragm. If the lens initially has an aperture of, say, f/5.6, which is typical for budget optics, it will have to be twisted up to f/8 – f/11 to get decent sharpness. It’s better to let diffraction affect the photo a little, but at the same time, we will remove all distortion from the side of the lens.
When not to close the diaphragm?
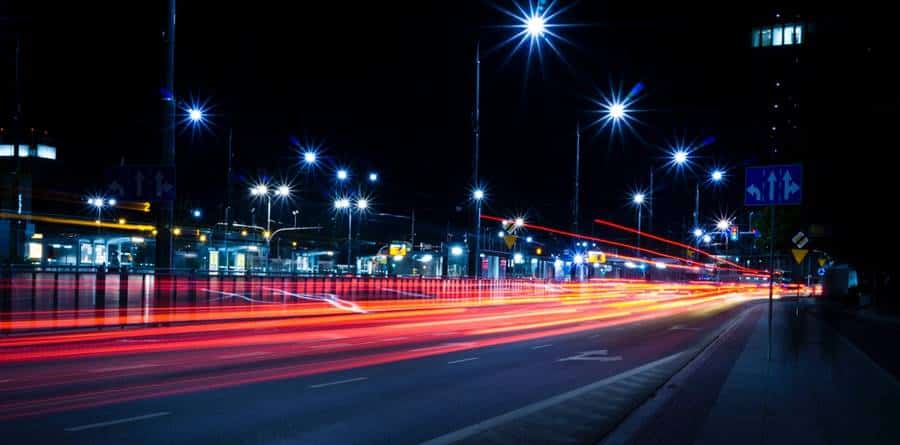
Often photographers close the diaphragm to shoot blurry car lights or water in a mountain stream at long exposures. And they get low-quality images. Yes, the shutter speed lengthens when the aperture is closed, but even at f/22 in daylight, it is unlikely to get long enough to work effectively with motion blur.
ND filters are needed to work effectively with long exposures. It also helps a lot when the camera has very low ISOs. For example, Nikon D810, Nikon D850, and Nikon Z 7 can lower the sensitivity to ISO 32.

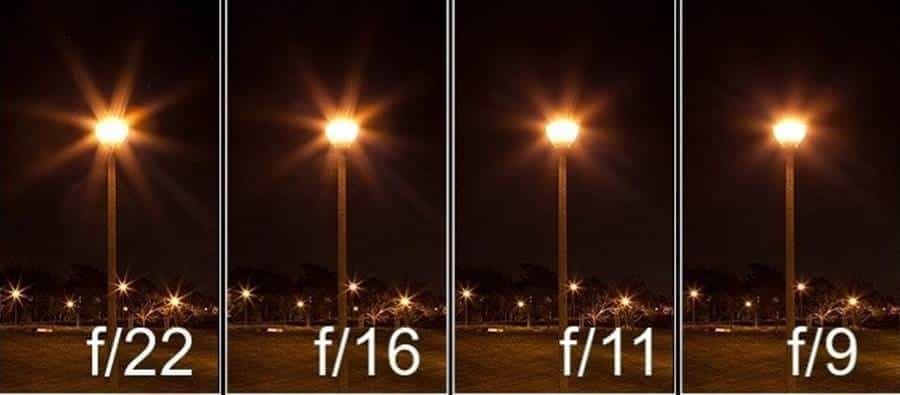
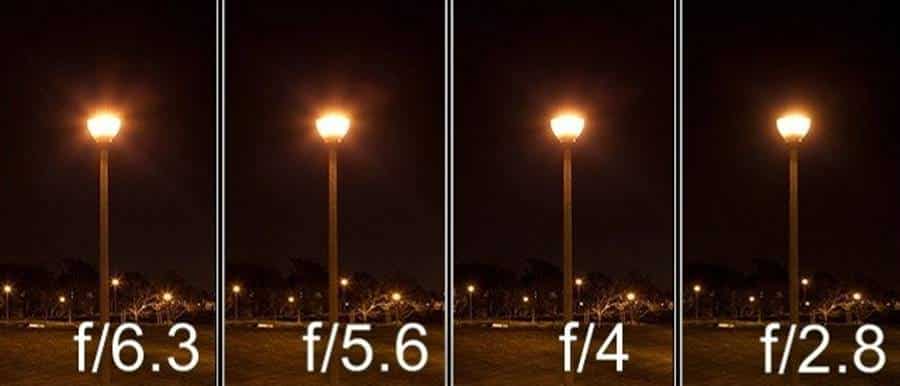
And you also don’t need to overly close the aperture in pursuit of stars around point sources of light – lanterns, the sun, since spectacular rays on most lenses are formed already at f/11 – f/14.

How to Avoid Diffraction in Photography?
Diffraction has a severe impact on image quality. How to avoid it in photography?
1. First, you need to skillfully work with the aperture, avoiding both too low values and as large as possible, even if your camera allows them to be set. In the first case, diffraction can appear due to the smoothing effect, that is, the natural bokeh around the main object; in the second, the total amount of light entering the lens decreases, hence the drop in detail. It is believed that after f = 11, the diffraction probability is high, not to mention the limiting aperture values of 22 and beyond.
2. Secondly, a polarizing filter on the lens will be helpful; it will remove the need to close the aperture in some situations (in bright sun, the priority of long exposure for shooting water, etc.).
3. Third, and importantly, the choice of good photographic equipment. Expensive optics are made differently: better and more correctly selected lenses, high aperture ratio, which is sensitive to light and perceives it better regardless of the day. Pictures taken with a professional camera are bright and sharp.
4. Fourth, I would like to point out the general awareness of the photographer. Specifically, I mean the user’s knowledge of the depth of field scale and the ability to calculate the hyperfocal distance, where the focal length of the lens is not the last.
Conclusion
Let’s summarize. On modern crops, the sharpness of the image decreases after f/11, on a full-frame – after f/14 – f/16. Due to the lower pixel density on the matrix, full-frame cameras (even multi-megapixel ones) provide a high-quality, detailed image even at closed apertures. So it would help if you were not afraid of some particularly terrible diffraction in practical work. Working with closed diaphragms is possible and sometimes necessary. It would help if you did it consciously and did not abuse shooting with the aperture closed to the limit.
Frequently Asked Questions

Q1: What is diffraction limit?
Answer: The diffraction limit is a fundamental limitation of the accuracy of measurements of the geometry of objects in traditional optical systems. Due to diffraction, the high-frequency components of the image completely attenuate, and groups of small-sized elements of the boundary cease to be resolvable. Estimation of the object boundary by known algorithms becomes smoothed with its actual shape.


